
DIY Farmhouse Dog Gate

I am on team, you DON’T have to compromise aesthetics when it comes to your pets. This is an easy DIY dog gate made to match your farmhouse style! This gate is made almost completely out of a sheet of plywood, so it takes very minimal materials!
Planning this Gate
We started looking for a dog gate a few months ago. We didn’t want to have to put our dog in her crate as much, but we also didn’t want to leave her with free roam of the house. I began my search for a dog gate. I found very few that would fit our space well, and I didn’t find any that looked nice. Plus, they were all so expensive! Naturally, I recruited my husband for another DIY project. The entryway we wanted to have the gate cover has a shiplap wall, so I decided to create a shiplap gate so that the gate would blend in as seamlessly as possible. We also didn’t have a whole lot of floor space in this area, so we needed to make it a sliding gate, as opposed to a swinging one.

Materials Used
2x4x4 (we just used scrap)
Wheels (we used these from Amazon)
Wood Glue
Nail Gun & Nails
Drill & Screws
Table Saw, Miter Saw, or Hand Saw
Below is a list of cuts & dimensions that we used for our gate. You will have to take your own measurements to make sure your gate fits your space! Use these instructions as a loose guide.

Instructions - Getting Started
First, take your measurements. Decide the height you want your gate, how wide you need it in order to cover the door way, and remember to take into consideration the sliding gate holder we will be making.
Once you have all you measurements sorted out, start cutting the plywood. We were able to use our table saw, but you can also use a hand saw or get your plywood cut at the hardware store (just make sure you have your measurements ready!). When all your frame and shiplap pieces cut, you can begin to assemble.

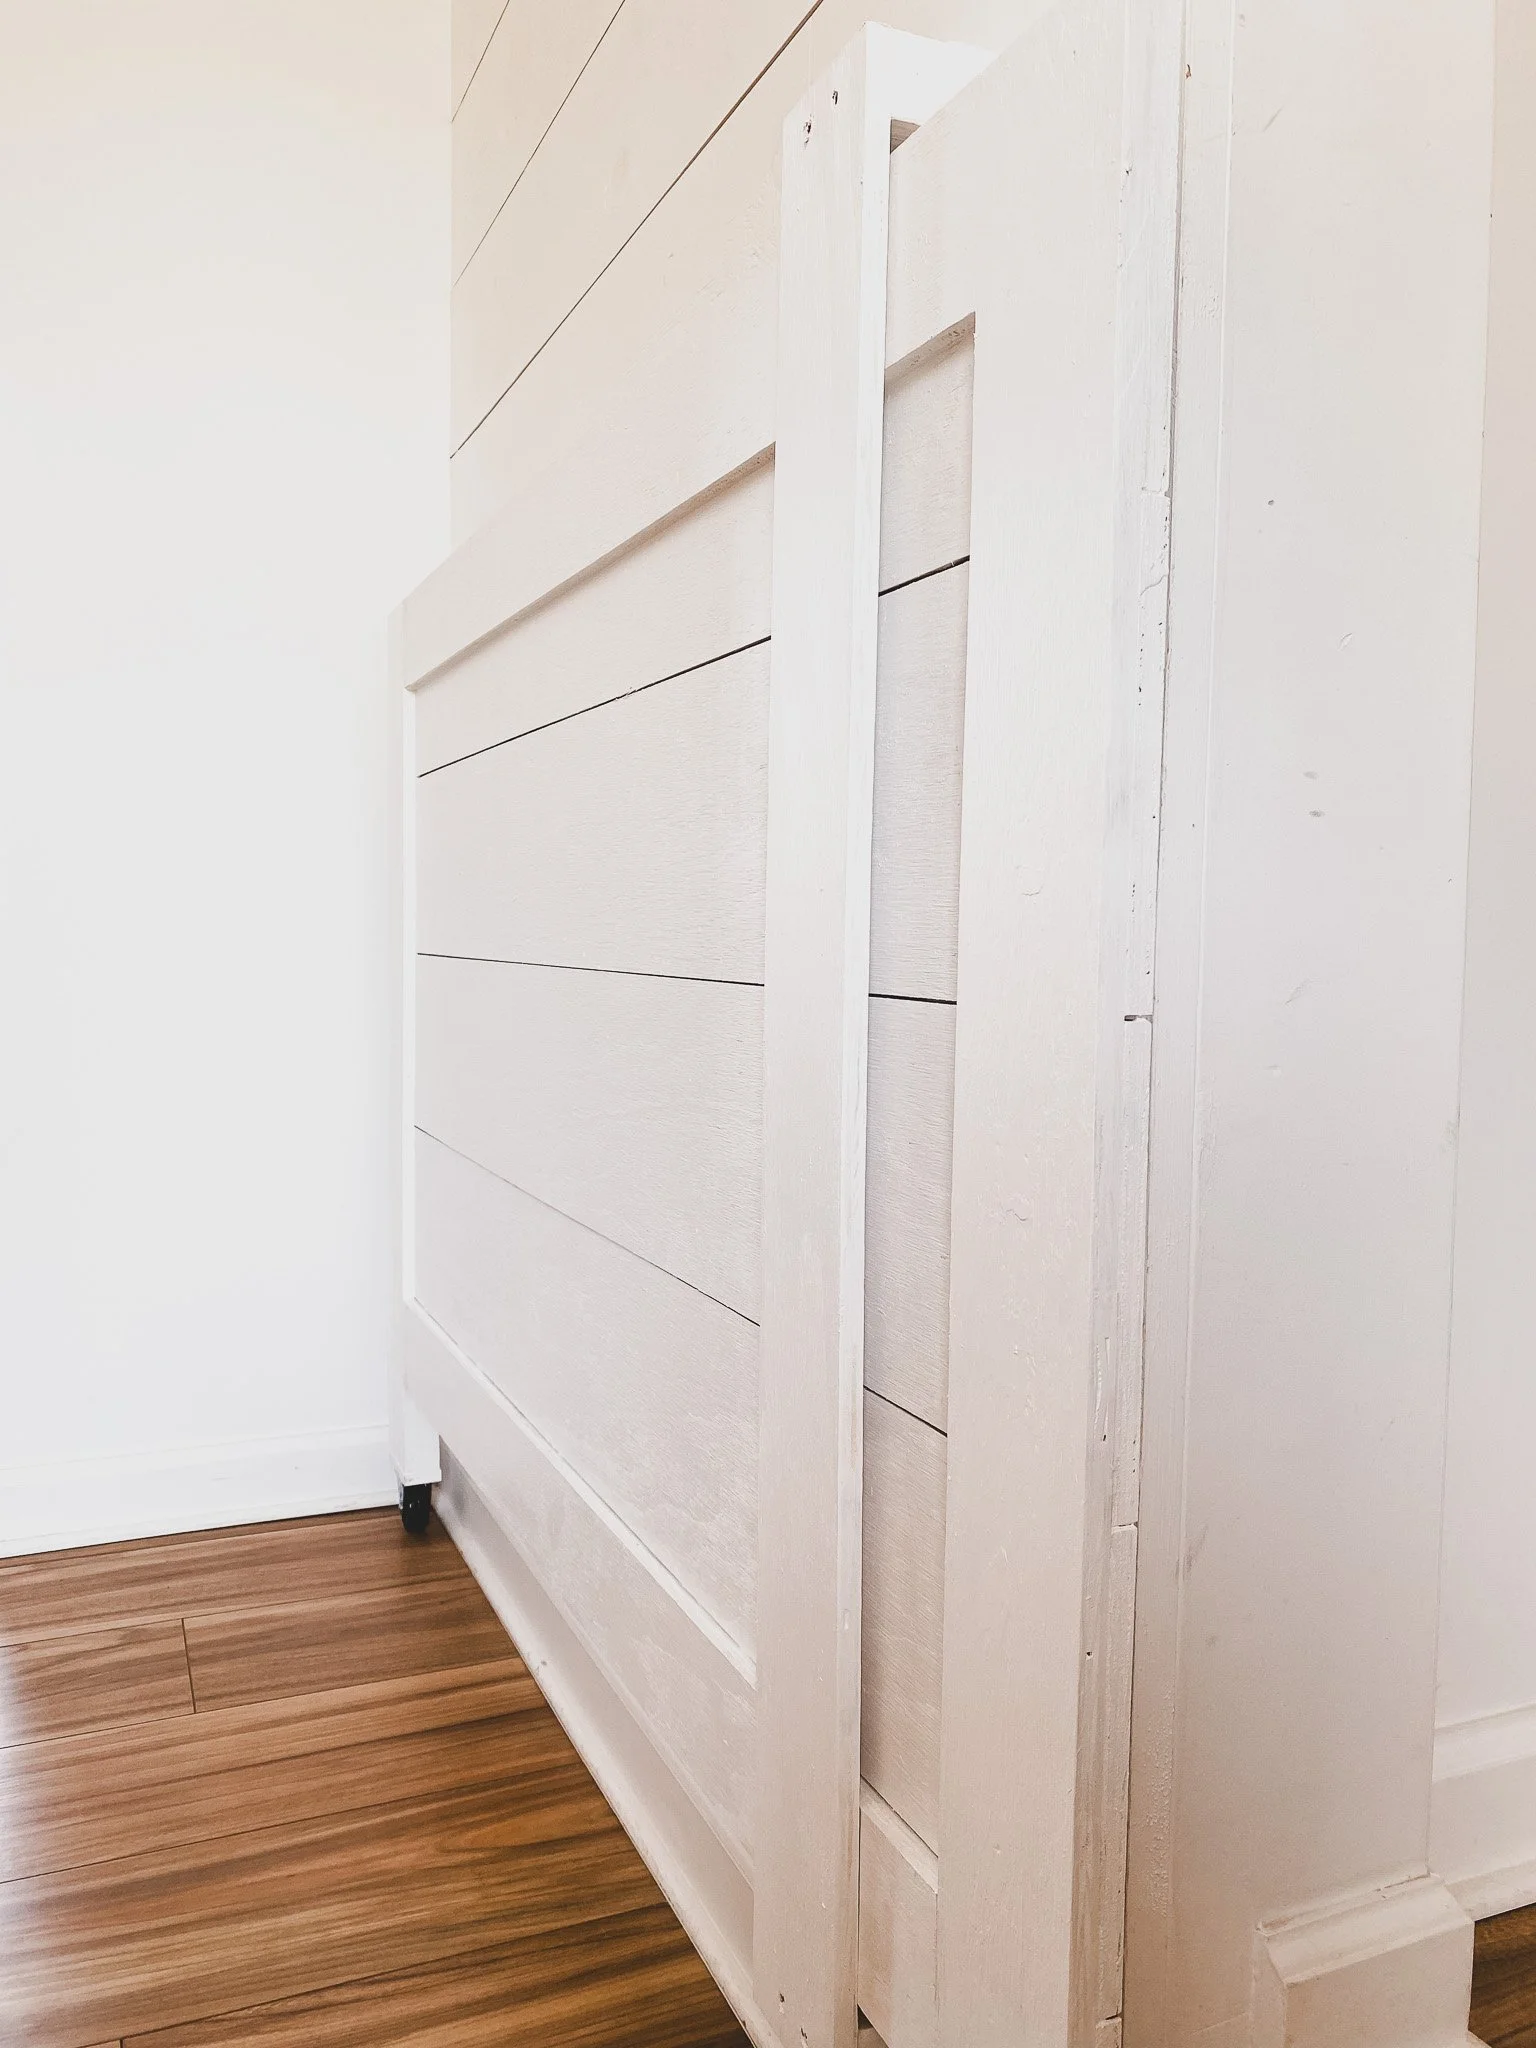
We laid out the shiplap pieces on the floor and lined them up as best as possible. You will want to space the shiplap pieces with a nickel (that is what will give you those distinct horizontal lines). Once you have all the pieces lined up, start putting the frame in place. We had the side frames go all the way to the top and come down below the main part of the gate (as you can see in the photos). So start by placing both side frame pieces on the ship lap, make sure the corners are as square as possible, and nail them together! While remembering to use a nickel to space out the shiplap pieces, continue to nail the side frames to each piece of shiplap. Then line up the top and bottom frame pieces with the top and bottom shiplap boards, and nail them together. It should be looking like a gate now! .
Attaching the Wheels
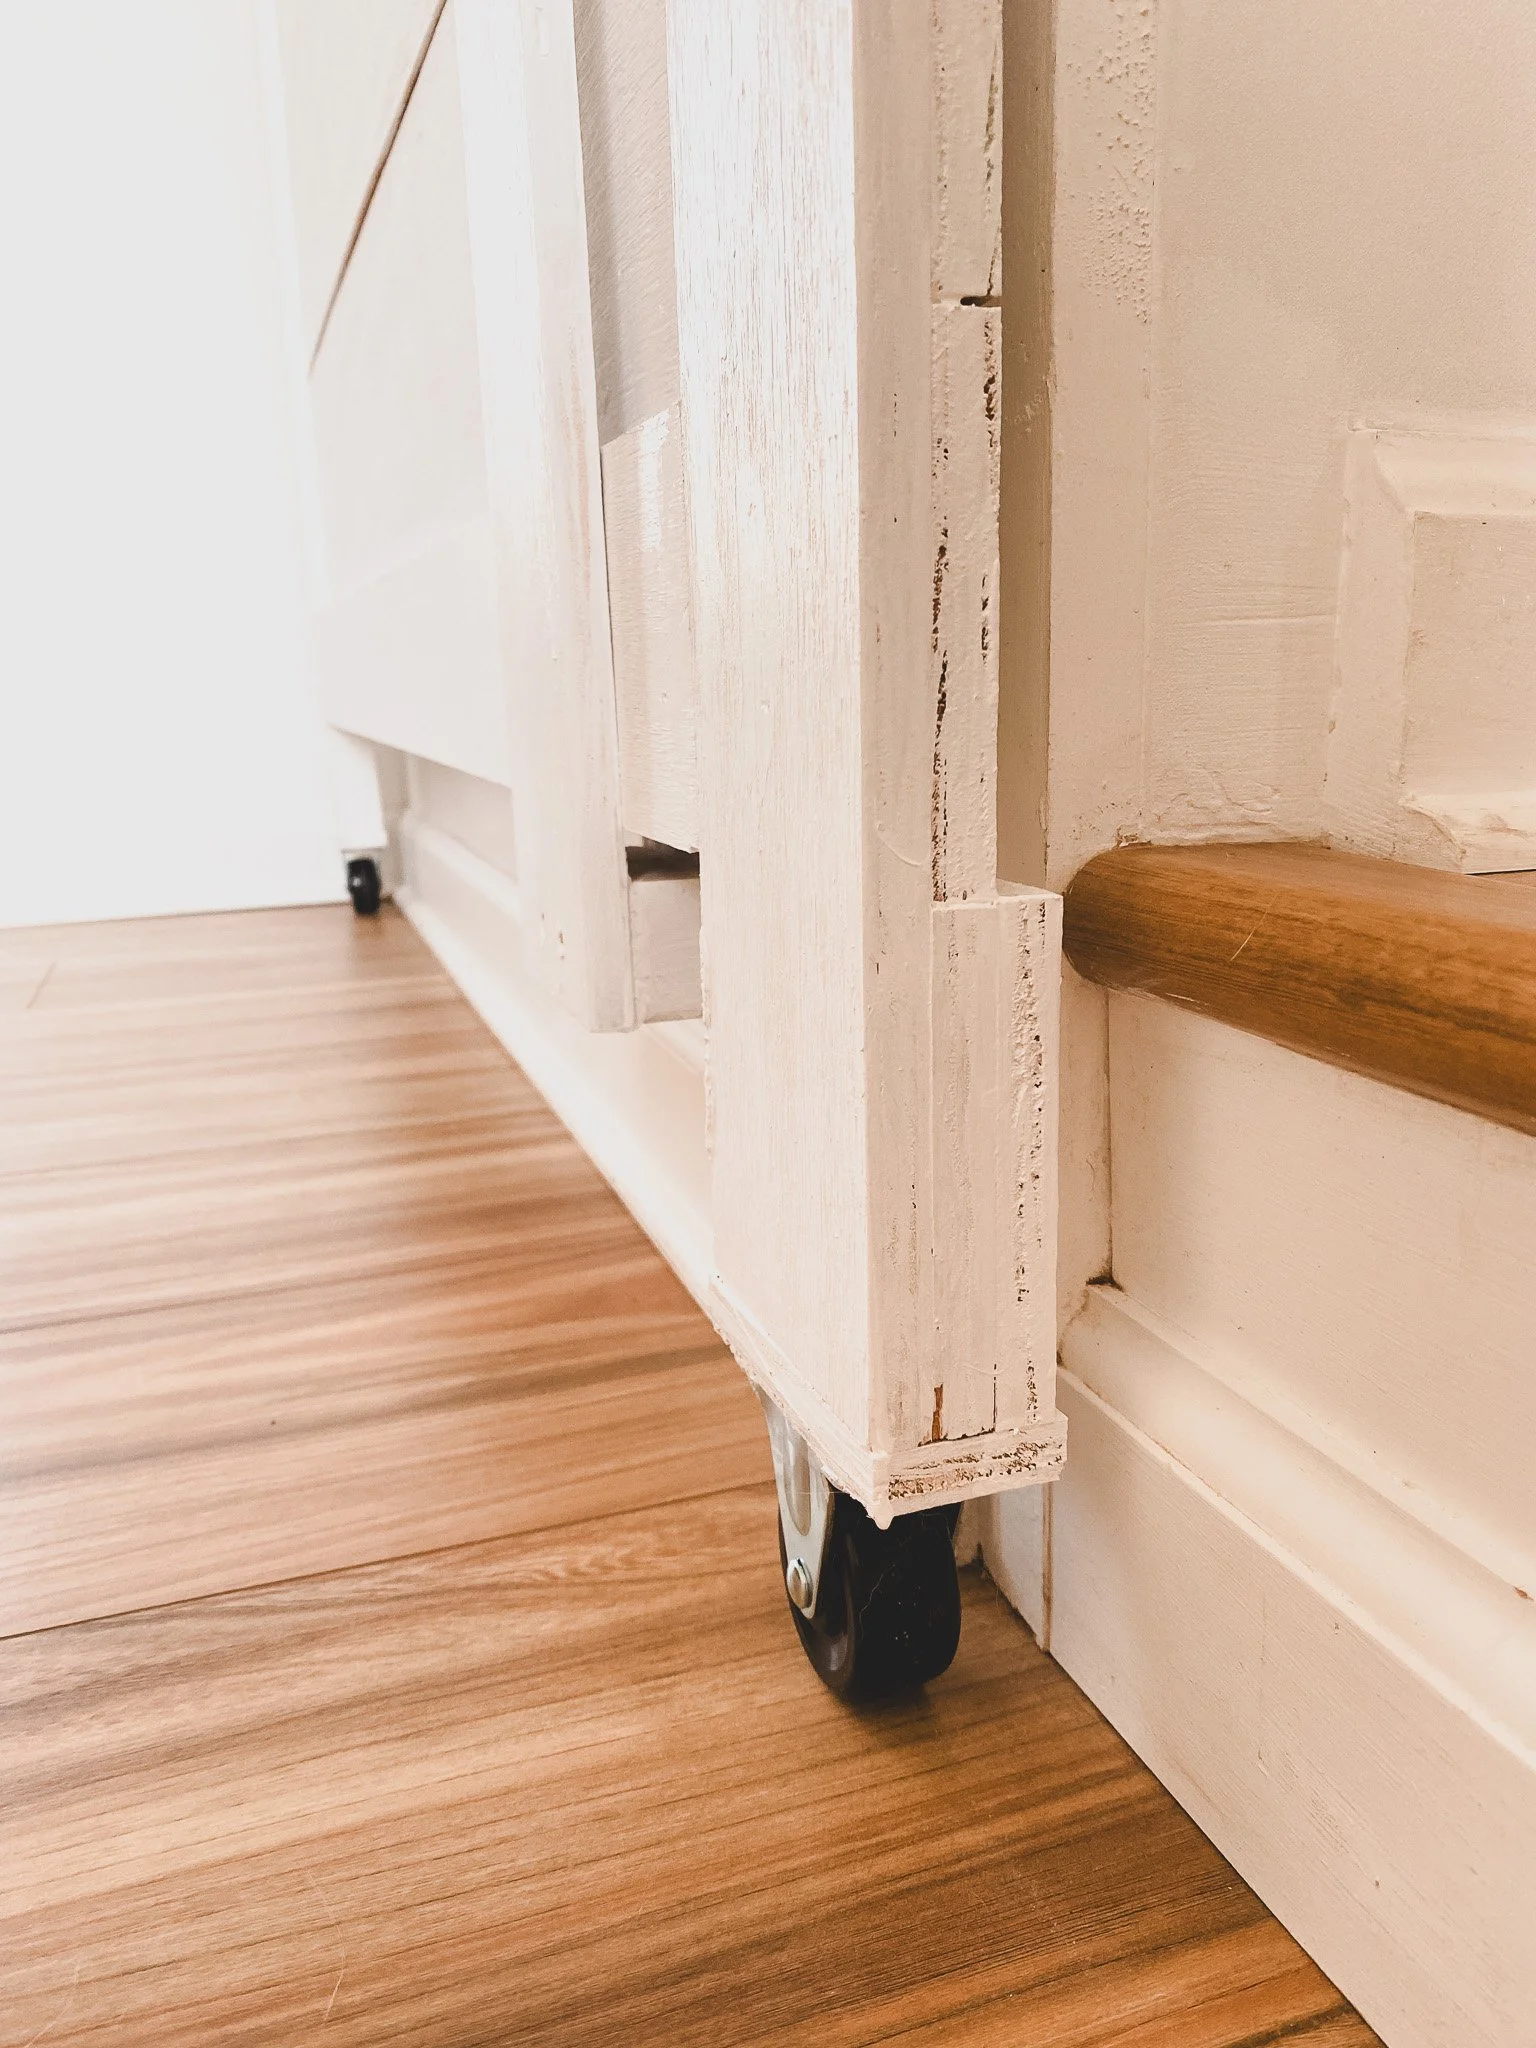
The connecter plate of our wheels were wider than the single piece of plywood that it would’ve needed to connect to. So we had to add some depth the the legs of the gate in order for the wheel to be attached. You can see in the picture we have 3 layers of the plywood right above the wheel, as well as a horizontal piece of plywood connecting them all underneath. This is what the wheels were screwed into.
We were able to use wood glue and a few nails to connect all these little wood pieces together.
Creating the Gates Sliding Guide
The sliding gate holder (for lack of a better name) is made up of 2 spacers (made with 2x4 pieces) with one at the top and one at the bottom, sandwhiched between a strip of the plywood for the front piece, and a 2x4 as the back piece.
The dimensions for all these pieces will depend on the size of gate you are making and what you will have to work around in your home. For example, we had to use the 2x4 up against the wall, instead another piece of the plywood, because we needed our gate to come out farther from the wall so the wheels wouldn’t interfere with the baseboards.
Begin assembling off the wall. Screw in the spacer pieces to the top and bottom of the back piece (ours being a 2x4). Take those 3 connected pieces and mount it to your wall, by screwing into the long 2x4. Before putting on the front piece of the sliding gate holder, take your finished gate and put it into place. If everything looks as it should, secure the gate in place by screwing on the front piece of the sliding gate holder.
Finish off the gate by calking all the gaps and nail holes, and then finally by painting it!
We have not attached a lock yet.. we have not found any locks that are subtle enough, in my opinion. However, unless you dog is a master escape artist, you might not even need a lock. This gate is heavy and is not easily pushed to the side. Plus, since this gate slides to open instead of being pushed or pulled, your dog wont be able to whack it open!
This gate has worked great for us, and I love that it is not an eyesore! I hope this can at least give you some inspiration to customize your own dog gate that fits your home.